


Christmas in a Jar by Jennifer Ryan Kelly
Craft Curator Jennifer Ryan Kelly
Days are getting colder, all the more reason for you to keep warm! What better way than to stay inside and make a winter wonderland jar? So gather your materials, wrap yourself up in a blanket and have your hot chocolate by your side,and let's get started!
What you will need: hot glue gun, jar, oven hardening clay, pencil, paint, paintbrush, styrofoam, oven, sticks, and leaves.

Step 1:
Roll little bits of clay up, make two or three little balls for your snowman.
Step 2:
Make triangular-shaped clay pieces, they will be the carrots for your snowmans' nose!
Step 3:
Assemble your pieces together as shown.
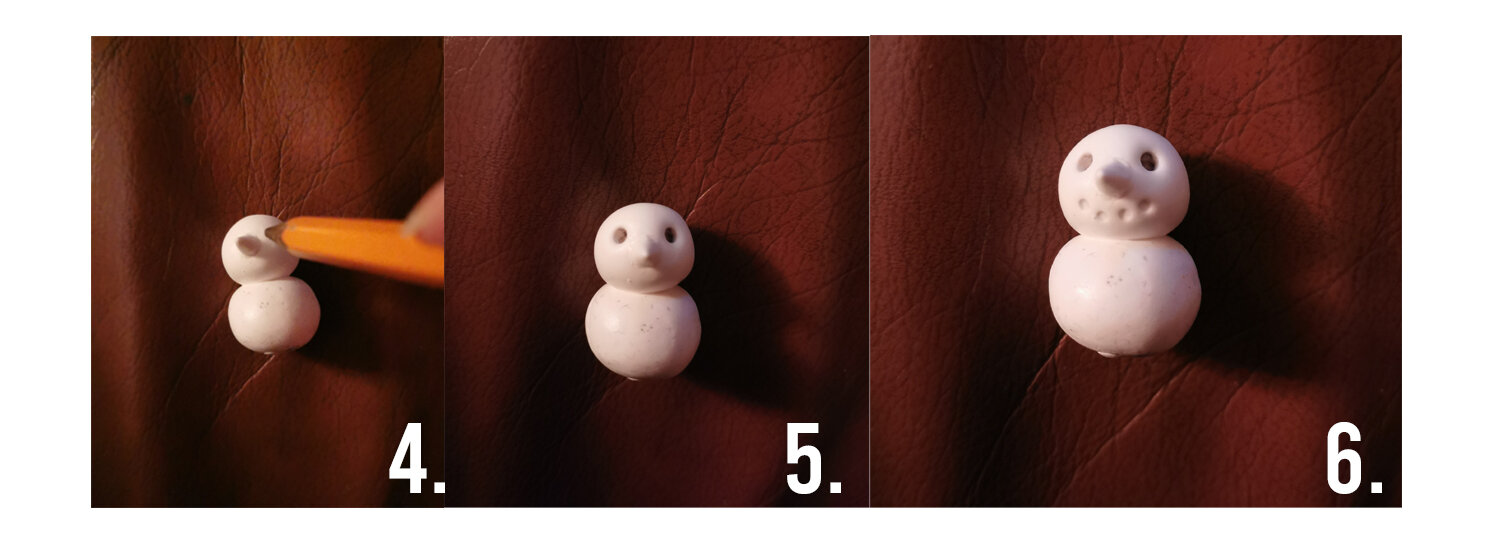
Step 4 & 5:
Using a pencil, make little indents for the eyes of your snowman.
Step 6:
Make little dots under his carrot nose, this will be your snowman's mouth.
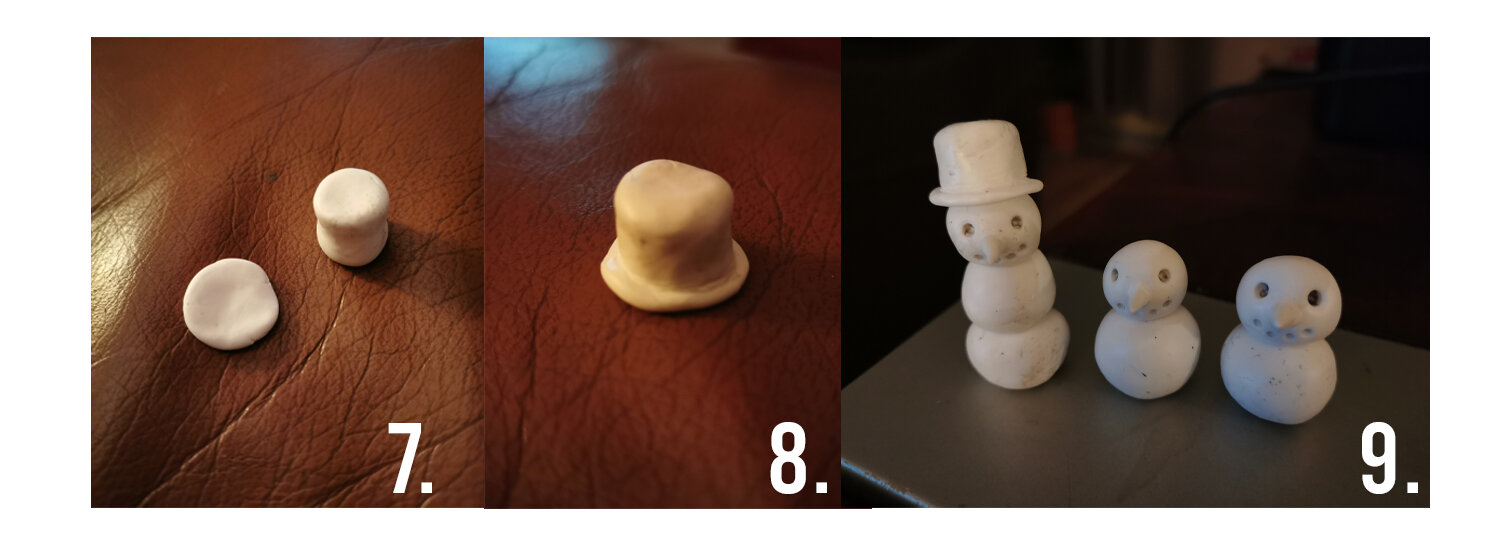
Step 7:
Customize a hat or accessory for your snowman, I'm making a hat. I rolled out a cylinder shape and flattened a circle down, for the base of the hat.
Step 8:
I joined the pieces together by smoothing them out.
Step 9:
I placed the hat on the snowman!

Step 10:
I'm making another hat for one snowman. Using a pencil, I wrapped the clay around the top of it.
Step 11:
I then proceeded to flatten the clay around to make it wider, then placed it on the head of another snowman.

Step 12:
Time to bake! I preheated the oven to 110 degrees celsius and placed my clay figures on foil, baking for 30 minutes and regularly checking to ensure they were not turning brown- which indicates they are burning.
Step 13:
While my figures bake, I obtained a jar and washed it out. This will be their new home.
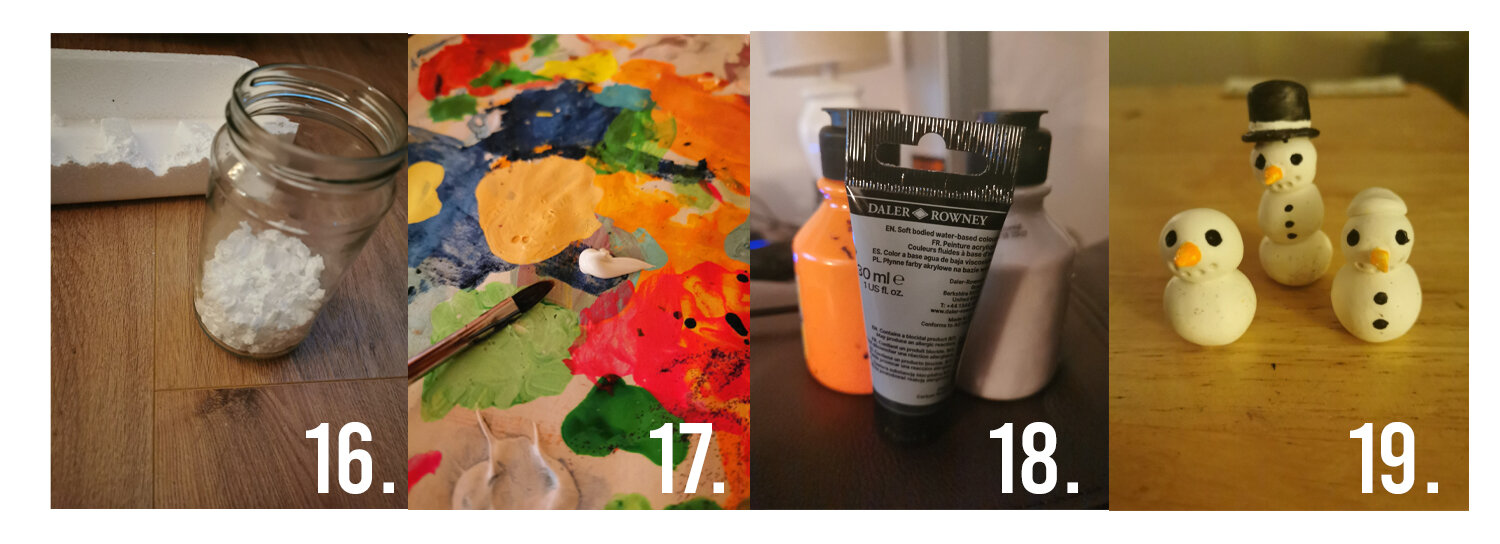
Step 14:
I found styrofoam from an old box. I thought it would be perfect for snow!
Step 15:
After 30 minutes, the figures are finished! I let them cool down for another 30 minutes before touching them.
Step 16:
I broke up the styrofoam into pieces and made snow, collecting them in the jar.
Step 17:
Now to start painting!
Step 18:
Gather all of the paint you want to use!
Step 19:
Paint anywhere on your snowmen, I went with the traditional colours.

Step 20:
I went outside and collected sticks and leaves!
Step 21:
I cut the sticks up, so they can fit in the jar and look like winter trees.
Step 22:
I painted snowflakes onto the jar with white paint.
Step 23:
I applied the hot glue on to the bottom of the snowman. And stuck it in the jar.

Step 24:
I used two out of four leaves and placed them in my jar also.
Step 25:
This is the finished product with everything assembled!

